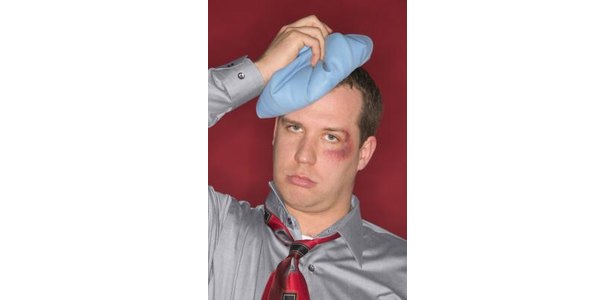
Just as Photoshop can remove the bruise, it also can help you create it.
 Most retouchers work in Adobe Photoshop to enhance portraits by removing flaws, relieving the signs of age and even removing extra pounds with pixel-based surgery. Some assignments, however, call for the retoucher to add flaws instead of concealing them, making a healthy subject look like the survivor of an accident, injury or an old-fashioned donnybrook. Adding the look of scratches and bruises requires the digital equivalent of special effects makeup, minus the cosmetics.
Instructions
-
- 1
Activate the Lasso tool and make a loose selection over an area on which you want a bruise to appear. Press the "Q" key to enter Quick Mask mode. Press the tilde key, located to the left of the numeral one, to view your selection as a grayscale image.
- 2
Open the "Filter" menu, navigate to its "Blur" sub menu and choose "Gaussian Blur." Set the blur radius to a high-enough value to soften the edges of your selection, but not so high that the entire area becomes a softly cloudy poof. Click on the "OK" button to apply Gaussian Blur. Press the "Q" key to exit Quick Mask mode.
-
- 3
Open the "Window" menu and choose "Layers" to bring up the Layers panel if it isn't already visible. Click on the "Create New Fill or Adjustment Layer" button at the bottom edge of the Layers panel and choose "Hue/Saturation."
- 4
Reduce the saturation level to a value between -10 and -20, adjusting it to suit your subject's skin tone. Reduce the lightness level to a value between -10 and -15, likewise adjusting for skin tone. To create a bruise that discolors the skin as well as darkening it, set the hue to -10 for a reddish tinge. Click on the "OK" button to apply your adjustment layer.
- 5
Add a "Levels" adjustment layer above your Hue/Saturation adjustment. Drag the shadow slider to the right to between -20 and -30 to darken the bruises. Your entire image will darken for the moment. Click on the "OK" button to apply your Levels adjustment. Open the fly-out menu at the top right corner of the Layers panel and choose "Create Clipping Mask" to confine the actions of the Levels adjustment to the area affected by the Hue/Saturation adjustment, darkening only the bruises.
- 6
Activate the Brush tool. Right-click on the document window and choose one of the small sizes from the series of "Soft Round" brushes in the Brush Picker.
- 7
Click on the "Create a New Layer" button at the bottom edge of the Layers panel. Change the new layer's blending mode to "Multiply" using the drop-down menu at the top left corner of the Layers panel. Reduce the layer's opacity to 50 percent using the master opacity control at the top right corner of the Layers panel.
- 8
Hold down the "Alt" key (Windows) or the "Option" key (Mac) to activate the Eyedropper and click on one of the bruised areas you already created. Release the modifier key and paint several partially jagged lines in an area in which you want scratches to appear.
- 9
Examine your scratch lines. If they appear too hard-edged, open the "Filter" menu, navigate to its "Blur" sub menu and choose "Gaussian Blur." Apply a very small blur radius to soften the edges. If the edges appear too soft, open the "Filter" menu, navigate to its "Sharpen" sub menu and choose "Sharpen Edges."
- 10
Hold down the "Control" key (Windows) or "Command" key (Mac) and click on the layer icon for the layer that contains your scratches. Adobe Photoshop loads a selection equal in area to the size of your scratch details.
- 11
Open the "Select" menu, navigate to its "Modify" sub menu and choose "Expand." Set the expansion value to three pixels in a high-resolution file and one pixel in a low-resolution document. Click on the "OK" button to finish expanding your selection area.
- 12
Click on the name of the layer below the one that contains your scratches. Open the "Create New Fill or Adjustment Layer" menu at the bottom edge of the Layers panel and choose "Hue/Saturation." Photoshop creates a new layer immediately below your scratch layer.
- 13
Set the hue to -5 and the lightness to +5 to add an area of slightly lighter and redder tone around the scratches. This simulates the puffiness around a healing wound. Click on the "OK" button to create your adjustment layer.
 Most retouchers work in Adobe Photoshop to enhance portraits by removing flaws, relieving the signs of age and even removing extra pounds with pixel-based surgery. Some assignments, however, call for the retoucher to add flaws instead of concealing them, making a healthy subject look like the survivor of an accident, injury or an old-fashioned donnybrook. Adding the look of scratches and bruises requires the digital equivalent of special effects makeup, minus the cosmetics.

